
It was just an ordinary Saturday when I came across the tutorial for a belt bag on Closet Case’s website. And immediately, I was sold! I mean, how hard could this be? Get some leather, and a few accessories and I’m in business. 
Well… it was a little more involved. So where do I begin? The tutorial is free on Closet Case’s website if you sign up for their resource library. But let me be frank: the tutorial is honestly an outline of how to make a belt bag, but the tutorial recommends making it your own way – and so do I. I believe this is for an intermediate sewist depending on the materials you use and if you plan to add a lining.
What exactly does the tutorial offer? It offers a printable pattern, suggested leather and a list of supplies. 
If you follow me on Instagram then you know that I worked on this in my stories. My followers saw 90% of this project -from the failed belt attempts to the test stitches. To be clear, I had somewhat of a foundation working with leather because I work with vinyl. It’s not the same of course, but there are similarities like stitch lengths and rules to cutting and sewing etc. Here’s what happened.
I cut my leather using a rotary cutter. Sorry, not sorry. 
I bucked the system and actually bought leather needles for my sewing machine, and upholstery thread. I believe the tutorial calls for hand sewing. I avoid this at all costs. I also purchased a buckle for my handmade belt.
By the way…my sewing machine did great working with leather. 
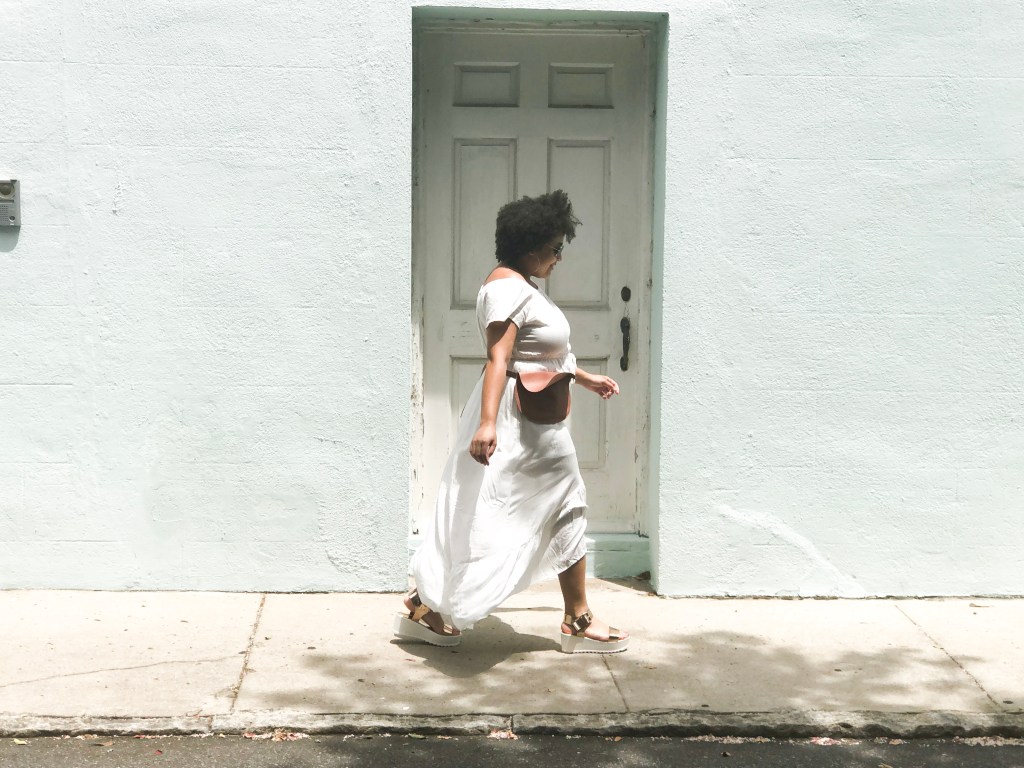
Seeing that I already had a small-ish size of leather hide from Tandy Leather I saw no reason not to use it for my project. Enter lesson learned number 1: use a stronger leather hide for this project. What I found is that the lamb hide that I had in my stash was so thin that in normal everyday wear and tear the design will collapse on itself. I would almost have to carry my phone in my hand if I wanted to use this bag for everyday use. The weight was too much for the type of leather I used. 
The tutorial says that you can use a belt you already had. I made my own belt, because when does that ever happen? I watched a video on Youtube, but I have my own steps below:
- Cut your leather small enough to match the width of your buckle. For example, my belt buckle was an inch wide. I made the strip for the belt at 3/4 inch wide.
- The tutorial says that the belt strap should be 6-8 inches longer than your waist. This is true. I made decorative stitches to connect my strips since my hide was smaller and I didn’t have one continuous piece of leather.
- I made a small rectangle piece. It should be a half inch wide and 3 inches long. Sew right sides together.
- Take your small rectangle piece and slide it onto your belt strap.

- Loop the strap through the bottom of your buckle assuring that the slack is placed past the small rectangle piece.Take a wonder clip to hold it place. Sew the belt strap on itself.

 Using a hole puncher add as many holes as you like. I recommend trying on your belt before taking this step so you know exactly where to place your holes.

I think the biggest challenge I faced with this project was the closure. You have probably already noticed that I don’t have one! That’s because I bought snaps, but the stud on the snap was too long for my leather. If I had more time, I would probably try to find washers but by the time I finished testing snaps on scrap fabric I decided that I needed to find another solution. I considered magnetic snaps -but that would leave an eyesore on my bag flap. I considered some sort of knot and hook installation. I couldn’t figure out how that would work with the resources I had at home. So, on the advice of another sewist… and my gut feeling…I decided to leave the bag without a closure.
Was this project perfect? No. But I tried. Like I really tried. So many parts of this project were beyond my wheelhouse but I’m actually really proud of it. I got so many compliments on it, I don’t think anyone would notice the imperfections had I not pointed them out.
Would I make this again? Yes…but I would do it completely different. One, I would add a lining, buy stronger leather and of course add a closure.
