
You spoke up! You voted unanimously, and here it is the flat lay tutorial! Let’s start from the beginning. Flat lays have been around for a long time. It’s not an original idea, but you can make it your own by adding your signature touch.
Silly me, I didn’t realize that this was a thing until about a month ago. I know you’re going, “Huh?”
I’ve been laying out my Etsy products to take pictures since the beginning, but I never knew what the term was called! Low and behold, it’s a flat lay! Fast forward to a few weeks ago where I was attempting to do a general flat lay about a sewing project – and I got stuck. Why? I had been doing these for the longest time on my Etsy shop, and now I’m struggling to make fabric look pretty?!
So I did my research, looked at other Instagram accounts and I was inspired, but still stuck. Then finally, one of my friends, who is a photographer, gave me one good tip! More on that later. So with her tip, and my tools, I was able to make an Instagram worthy picture!
Like any project or tutorial you’re going to need supplies. Don’t worry, these are all cheap or you may actually have them lying around! These are the fundamentals of any flat lay no matter what!
Supplies:
- Wood planks (I used them religiously my first year with Etsy) You can buy them at Walmart.
- Science board or foam board
- Natural light (I usually go outside to my patio)
- Camera phone or professional camera
Brainstorming:
- I always try to think about the message that I want to convey.
- Is it a lifestyle?
- A fantasy?
- A color story?
- A project update?
Below are 2 examples of two of my flat lays and how I created my message:


Once I narrow down my message, I figure out what I want in my picture.
If it’s about sewing I try to use my best tools and elevate the photo by simply creating a fantasy. When you daydream about sewing, no one ever thinks about the seam ripper or the jammed bobbin. Everyone always thinks about their fabric, the thread, the good scissors and the pattern and how everything is going to work out. Convey that in your message! Here’s some examples of things you’ll need. You can use some of these, all of these or even more!
- Fabric
- Spools or a spool of thread
- Scissors
- Pattern envelope
- Pattern weights
- Straight pins
- Measuring tape
- Bias tape
- Maybe a sketch or notepad
If I’m trying to sell a bag, I always consider what could be inside the bag and try to create a lifestyle for the shopper. Maybe my customer loves sunglasses. Maybe my customer is an avid traveler. Maybe my customer loves my bag but can’t figure out how it will be useful to her. Take her there with your pictures!
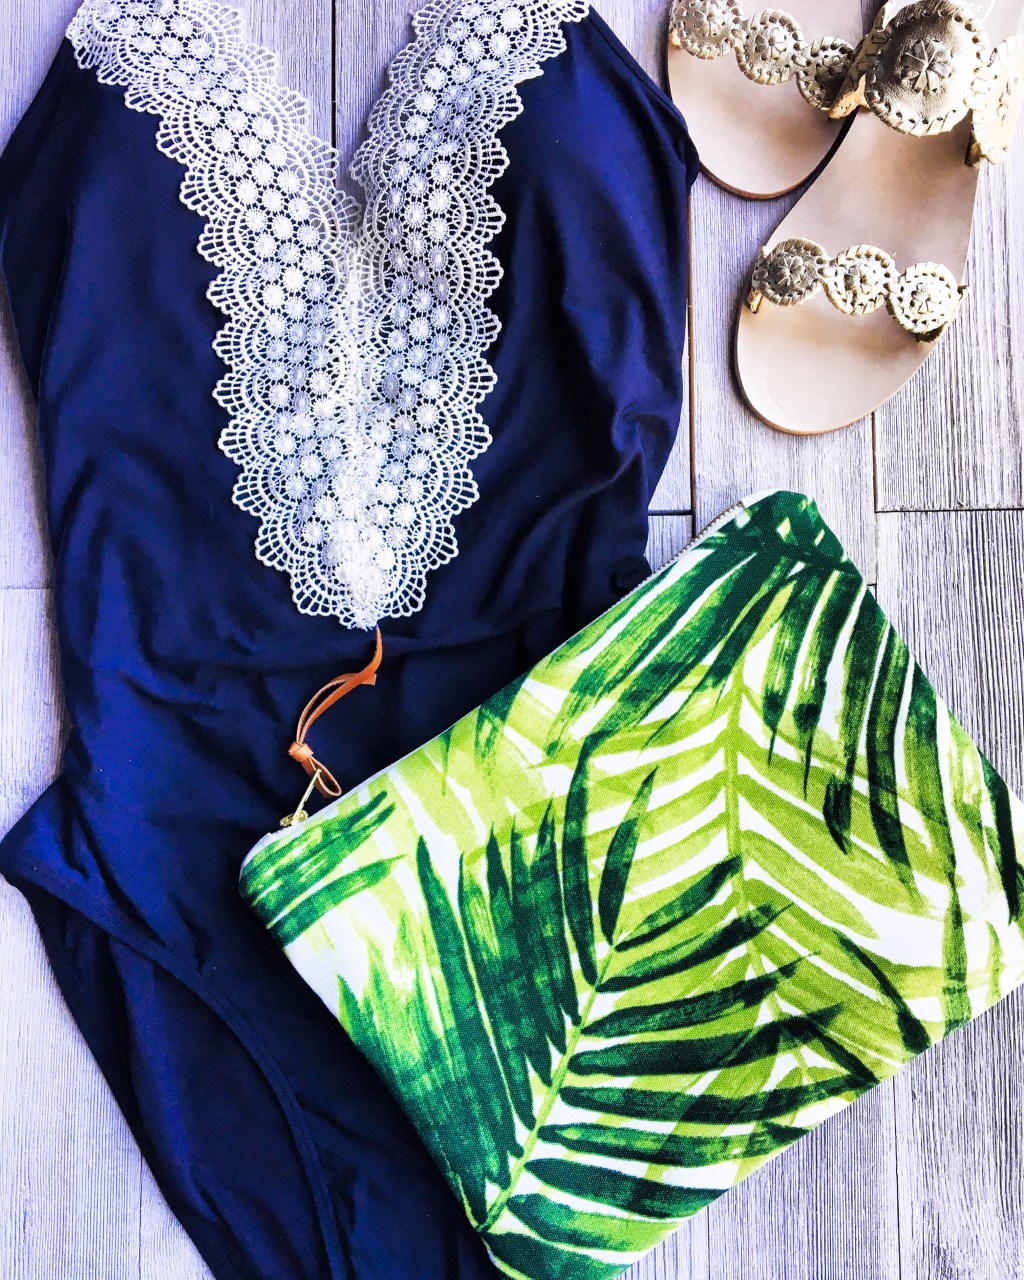
 Shop this look at my Etsy shop!
Placement: And here is the tip that my friend gave me!
Place your fabric in the corner of your shot!
Mind. Blown. It changed the whole flat lay perspective for me! That’s it. Placement.
Now, is this the holy grail? No, but it certainly helped me! Once you know how to place your fabric, you’ll become more confident and start to add and take away things that don’t belong in your story.
Here are a few other placement tips:
- Make one thing look less than perfect. I know you’re like “What?” It’s true, whether it’s pattern weights, your pencil could be diagonal, maybe your bias tape isn’t neatly folded. Something has to look like it’s under construction -but still picture worthy.
- Create direction. Where do your eyes go when you look at your picture? If it goes directly to something not in the central theme then you need to start over. Whether your direction is vertical, horizontal or diagonal create a path for the viewer that is pleasing to the eye and is un-fussy.
- Create a main idea and then decorate around it. Place the most important thing on your surface first! The other stuff is just fluff!
- Everything doesn’t need to be 100% in the frame. It’s okay if some things are slightly out of the frame. In fact, I highly recommend using your cropping tool to make a tighter shot to draw the viewer into the picture.
Optional tips:
Complementary colors
- There has to be some cohesion, right? You don’t always have to, but, it makes for a better photo if you have a color scheme that is pleasing to the eye, but isn’t overly obvious. Think about colors that match (even in your scissors, thread and pattern envelope). Every spec of color counts! See my example below:

Use something in the picture that doesn’t belong
- This adds great atmosphere. You can use a single daisy, a decorative piece from your home, a mason jar or even a cup of coffee. The roads to this are endless, but again, try to be less obvious about your random object.
Get inspired, but don’t copy!
- Head to Pinterest and search your favorite Instagram feeds and find out what people love!
Practice test shots.
- Yes, I mean that. Move things around. Ask IG. No, seriously, ask IG. When I was stuck on a flat lay, I went for help in my stories – and got it! Or, ask me! You know where to find me!
XO

